
Managing chatbots and credentials
In chatbot management, select the assistant you want to edit. Prompts, chatbot credentials, appearance and sources belong to the selected chatbot. Embedding settings are shared across all chatbots, although available credentials can differ between chatbots.
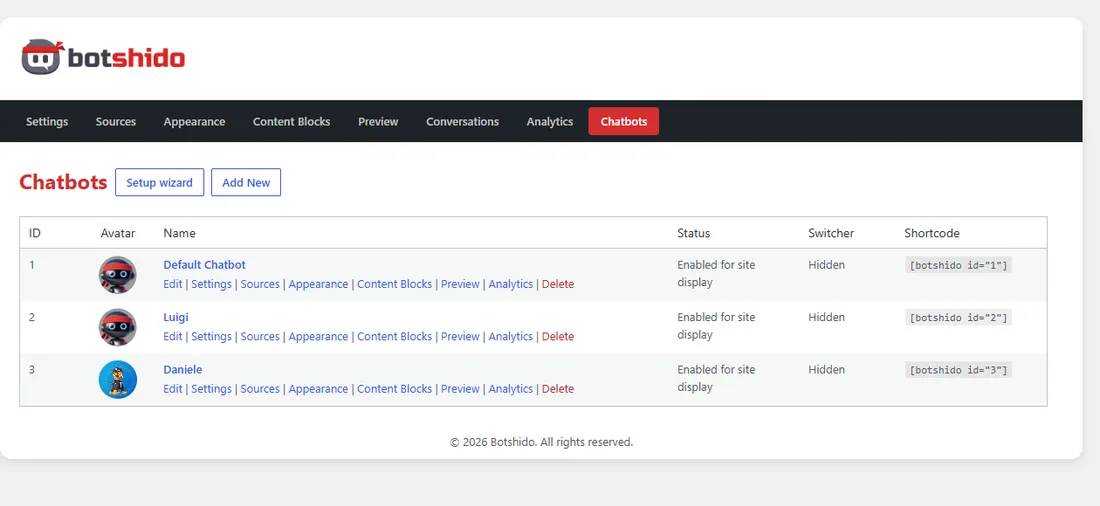
The Avatar column between ID and Name in the chatbot list shows the floating-button image for quick identification.
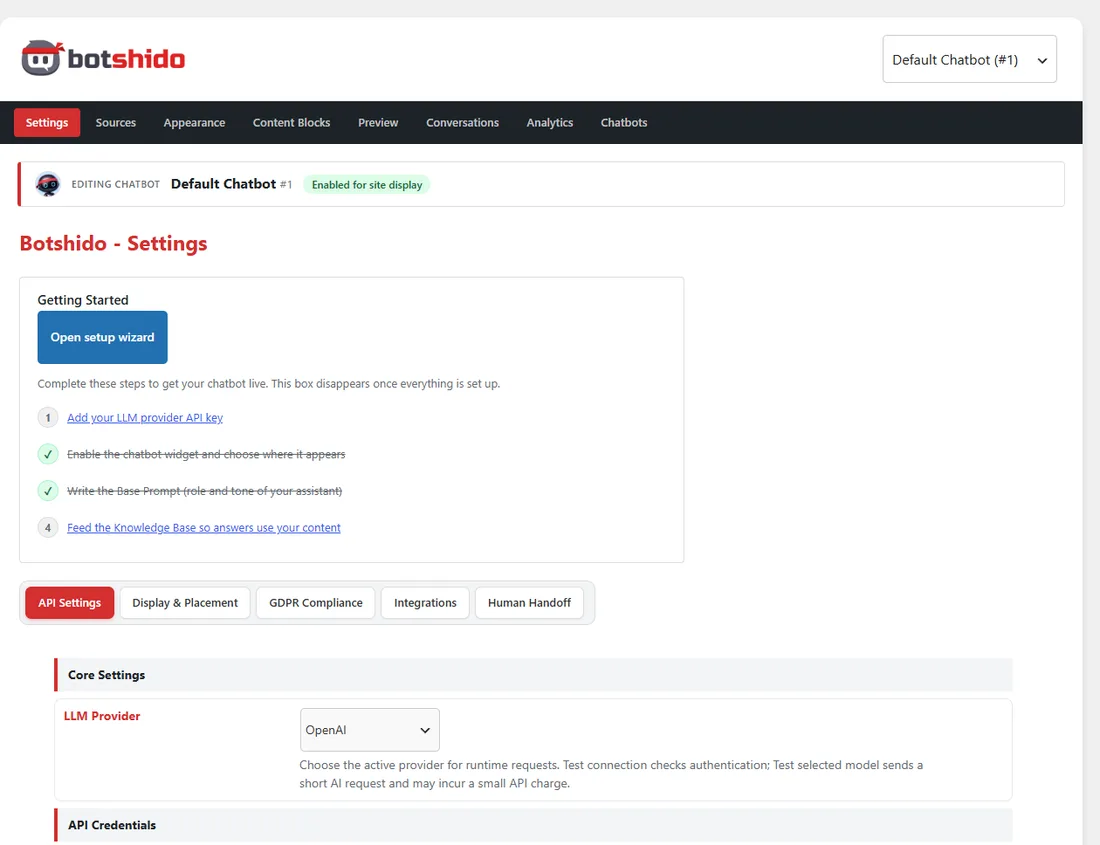
In the API tab:
- Select the LLM provider that will generate replies.
- Enter its API key and choose a model from the menu.
- Save, then run the model test to check actual response generation.
A connection-only test does not prove that your account can access the selected model. Availability, limits and billing depend on the provider. This guide does not duplicate the model catalog: the plugin menu lists the models configurable in your installed version.
When creating a chatbot and in the wizard, you can reuse API keys from another chatbot. There is no need to copy them manually; still check the new assistant’s provider and model. Where a field says to leave it blank to keep the saved key, an empty field preserves that key.
Server-defined keys — optional
Section titled “Server-defined keys — optional”The site administrator can define these constants in wp-config.php. They take precedence over keys entered in the interface:
define( 'NINJAIBOT_OPENAI_API_KEY', 'your-key' );define( 'NINJAIBOT_MISTRAL_API_KEY', 'your-key' );define( 'NINJAIBOT_ANTHROPIC_API_KEY', 'your-key' );define( 'NINJAIBOT_GROK_API_KEY', 'your-key' );Add only the constants for services you use. Do not place keys in prompts, public content or HTML blocks.